How to Open Your Account on Bullsmart (KYC Guide)
This guide walks you through the full account opening process, step by step. The whole process is done inside the app and usually takes about 5 to 10 minutes. Please finish it in one sitting, without pressing the back button or closing the app in the middle.
Before you begin
Please keep these ready. It will make the process quick and smooth.
- Your Aadhaar number, linked to the mobile number you have with you (an OTP will be sent to this number)
- Your bank account details or UPI ID
- Your signature (you can draw it on screen or upload a photo of it)
- A well-lit space for taking a selfie
- Your parents' names and a few basic details about your work and income
 Note: A charge of Rs. 1 is taken during bank verification. If you verify using UPI, this Rs. 1 is refunded to you within 24 hours.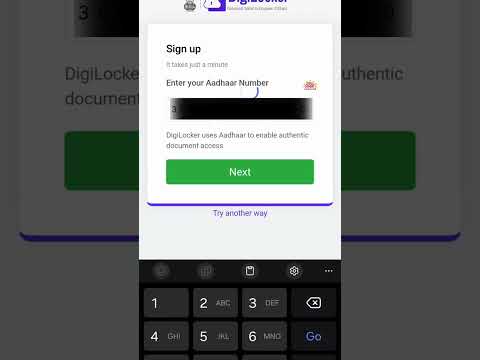
▶ Click to watch the KYC walkthrough video
Step 1: Log in with your phone number
- Open the Bullsmart app.
- Enter your 10 digit mobile number and tap Get OTP.
- Enter the OTP (verification code) you receive by SMS.
You are now logged in.
Step 2: Read the risk disclosure
- A short message about trading in Futures and Options will appear. This is a requirement from SEBI (the market regulator).
- Read it and tap OK, I Understand to continue.
Step 3: Start opening your account
- On the home screen you will see a message that says you have not opened an account yet.
- Tap Open an Account to begin.
Step 4: Verify your PAN
- Type your PAN number in the box.
- Tap Continue.
- Your name and PAN will be shown for you to check.
- Make sure the details are correct, then tap Yes, confirm.
 Important: Once you confirm, your PAN details cannot be changed later. Please check them carefully.
 If something is wrong, tap No, edit PAN and enter it again.
Step 5: Enter your personal details
The app will now ask you a few quick questions. Answer each one and move to the next.
- Parents' names: Enter your father's name and your mother's name.
- Date of birth: Select your date of birth and tap Confirm.
- Gender: Choose Male, Female, or Other.
- Marital status: Choose Single or Married.
- Occupation: Choose the option that matches your work (for example Business, Private Sector, Government Service, Student, and so on).
- Annual income: Choose your income range.
- Source of wealth: Choose where your money mainly comes from (for example Salary, Business, and so on).
- Investment experience: Choose how long you have been investing.
Step 6: Confirm the declarations
You will see a list of declarations that you must agree to. These are required to complete your KYC and open your demat account.
- Tick the box to agree to the declarations.
- The account settlement is set to Quarterly (90 days) by default. To change it to Monthly (30 days), tap the option, make your choice, and tap Save.
- Tap Proceed.
 Tip: If you do not tick the required box, the app will ask you to agree before you can continue.
Step 7: Add a nominee (optional)
A nominee is the person who will receive your investments in case of your death.
- Tap Add Nominees Now to add nominee details, or
- Tap Opt out of Nominee if you do not want to add one right now.
Step 8: Verify your bank account
You can verify your bank account in two ways.
Option A: Verify via UPI (Recommended)
- Choose Verify via UPI.
- Enter your UPI ID and tap Verify VPA.
- Your bank name will appear. A request for Rs. 1 will be sent to your UPI app.
- Open your UPI app, check the notification, and approve the Rs. 1 request before the session ends.
Option B: Verify via Bank Account
- Choose Verify via Bank Account.
- Enter your bank account number and IFSC code carefully.
 Please note: Do not press back or refresh the page while the payment is being processed. The Rs. 1 charged during UPI verification is refunded within 24 hours.
Step 9: Select your trading segments
Choose the markets you want to trade in. You can also change this later.
- Equity and Mutual Funds: For investing in Stocks, ETFs, and Mutual Funds.
- Futures and Options: Select this only if you are an experienced trader. This option needs you to upload an income proof.
Tap Continue after selecting.
Step 10: Verify your documents with DigiLocker
DigiLocker lets you share your Aadhaar and PAN safely using your Aadhaar number.
- Tap Share with DigiLocker.
- Tick the box to give your consent, then tap Submit.
- Enter your 12 digit Aadhaar number and tap Next.
- Enter the OTP sent to your Aadhaar-linked mobile number.
- If you already have a DigiLocker account, enter your 6 digit Security PIN to sign in.
- Wait a few seconds while your documents are fetched. Do not close or refresh the window.
Important: Your Aadhaar details must match the details of the person opening the Bullsmart account. If they do not match, your application may be rejected.
Step 11: Take a selfie
- Read the on-screen instructions and tap Take a photo or Capture Selfie.
- Allow the app to use your camera when asked.
- For a clear photo, please make sure:
- Your face is in bright light
- Your full face is visible
- You are not wearing hats, masks, or glasses
- You are wearing suitable clothing
- Place your face inside the circle and tap Capture.
- Check the photo, then tap Submit Selfie. If you are not happy with it, tap Retake.
Step 12: Add your signature
- When asked, choose to either Draw your signature on the screen or Upload a photo of it.
- Sign inside the box. Please make sure your signature matches the one on your PAN card.
- Tick the boxes to agree to the consent letter and the citizenship declaration.
- Tap Submit Signature.
Tip: If you see the message "Signature specimen is not valid," clear the box and sign again, a little larger and clearer.Step 13: eSign your KYC form
The app will now create your account agreement and KYC form.
- Tap Go to eSign.
- On the KYC form screen, tap Sign Now.
- Enter your Aadhaar number or VID.
- Read and tap Accept and Continue on the terms and conditions screen.
- Enter the OTP sent to your Aadhaar-linked mobile number and email.
- Wait while your OTP is verified. Do not press back or refresh the page.
Once this is done, your KYC and account opening request is complete.
What happens next
After you finish eSign, your application is submitted for processing. You will be notified once your account is activated.
After activation, you can start investing and trading, and you will see live prices instead of delayed ones.
Helpful tips
- Complete the process in one go and stay connected to the internet.
- Keep your phone with you so you can read the OTPs sent to you.
- Make sure your Aadhaar is linked to an active mobile number before you start.
- Do not press the back button or refresh the screen during verification, payment, or eSign steps.
- If a step fails, wait a moment and try that step again.
Need help?
If you face any issue during account opening, please reach out to our support team and we will be happy to assist you.

Bullsmart is a product of Skywards Investec Private Limited.
SEBI Registration No.: INZ000315235 | NSE: 90340 | BSE: 6953
CDSL DP ID: 12104200 | NSDL DP ID: IN302148.
Your data is 100% safe and secure.